Clinical Photography Setup for Small Clinics
Set up repeatable before-and-after clinical photos: neutral backdrop, two daylight LEDs, marked tripod, consistent poses, HIPAA storage.
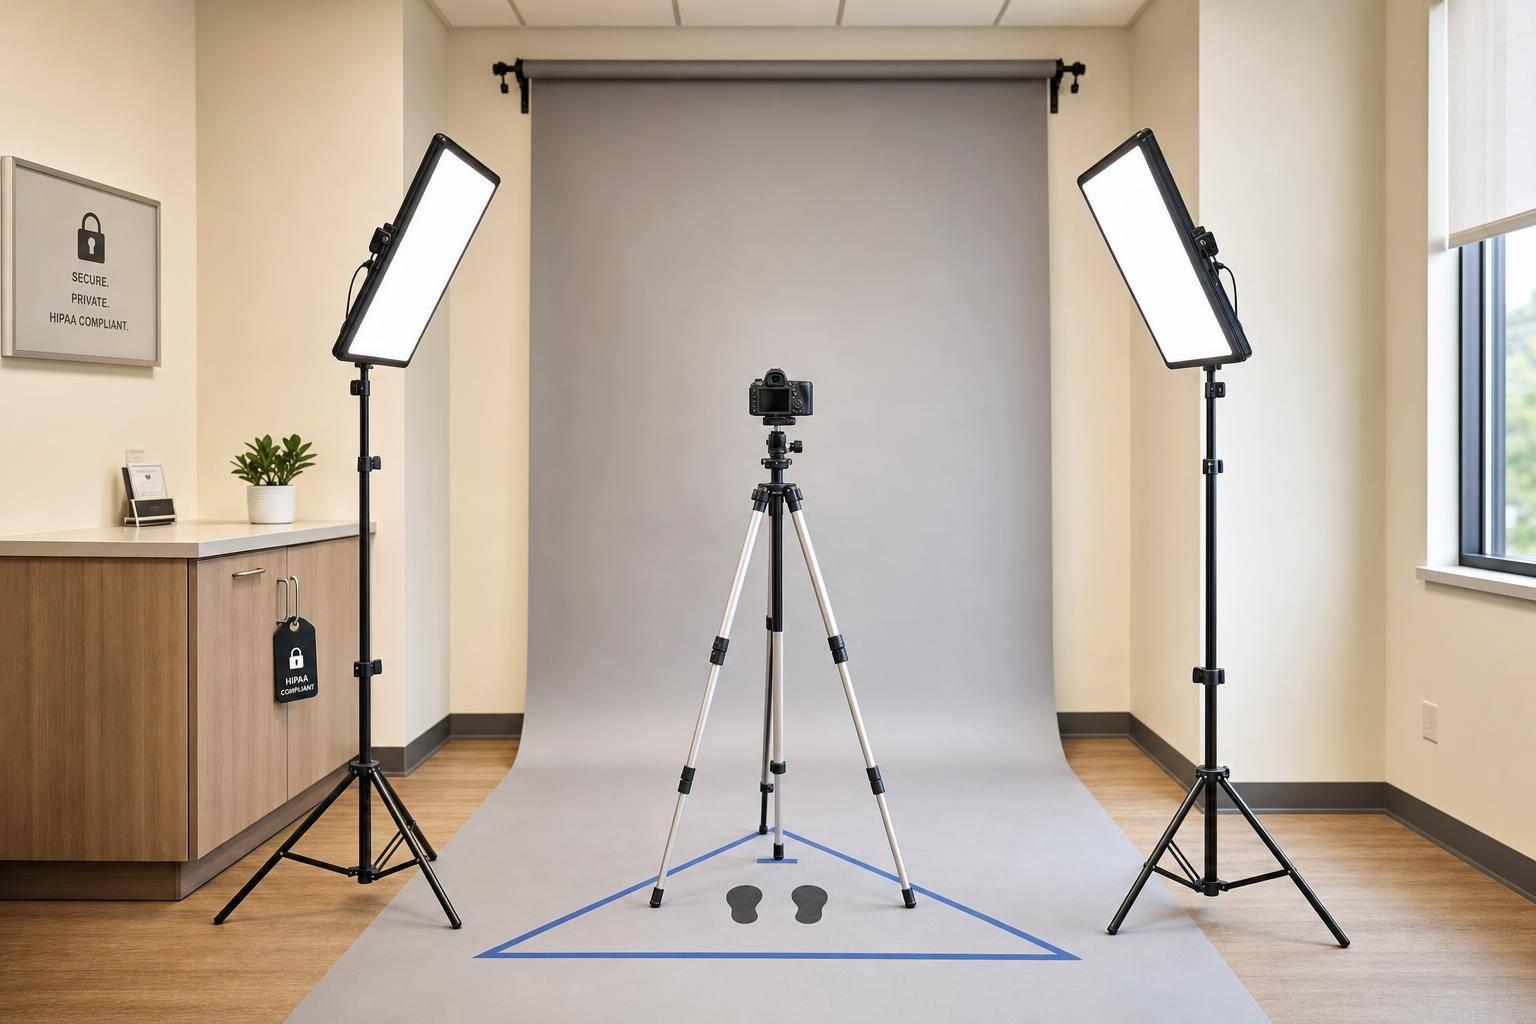

You do not need a studio to get clean before-and-after photos. I’d set up one fixed photo spot with a neutral backdrop, two lights at the same angles, a marked tripod position, and one repeatable patient pose routine.
If lighting, distance, or head position changes, photo comparisons stop being clear. That is the main point. A small clinic can avoid that by locking down five parts of the process:
- Background: one matte wall or backdrop in a neutral color
- Lighting: two daylight-balanced lights, placed the same way each time
- Camera position: same tripod height, same lens level, same distance
- Patient flow: same prep steps and same pose order at every visit
- Storage and reset: labeled gear spots, floor markers, and a short reset list
The article also makes two rules clear before any photos start:
- Consent must be documented
- Images must be stored on a clinic device in a HIPAA-compliant system
A few numbers stand out. The setup can fit in a 3–4 ft-wide by 6–8 ft-deep area. Facial photos usually work at 3–5 ft from the patient. Lights are often placed about 3–4 ft away at 45°, with color temperature set around 5,000 K to 5,500 K.
If I had to sum up the full article in one line, it would be this: pick one spot, mark everything, standardize every step, and reset the room the same way after each session.
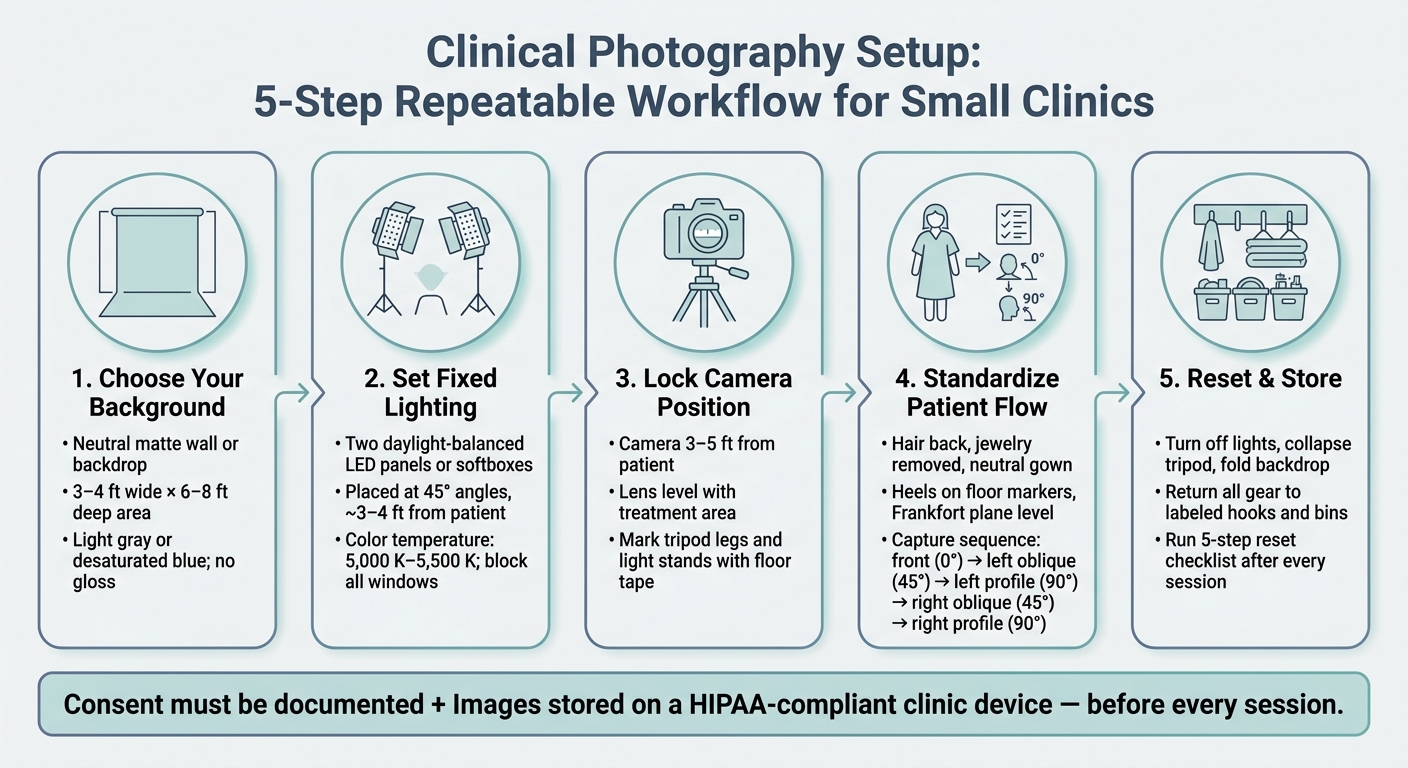
Clinical Photography Setup: 5-Step Repeatable Workflow for Small Clinics
Choose a Photo Wall or Backdrop for Limited Space
Start with the background. It sets the exposure and color baseline for every photo, so getting this part right makes everything else easier.
Pick one wall or corner that you can clear in a few minutes and keep the same from one visit to the next. A good target is a 3–4 ft-wide by 6–8 ft-deep area. Keep it away from foot traffic, doors, cabinets, mounted equipment, and wall decor. The point isn't to make the room look nicer. It's to create a fixed background so each before-and-after image is easy to compare.
Pick a matte wall color that keeps skin tones accurate
Use a true matte or flat finish. Glossy surfaces create hotspots and uneven exposure, which is a headache in any setup and often shows up more on darker skin tones. Glossy oil-based paint causes the same issue.
Skip pure white if you can. Light gray or a desaturated light blue tends to keep exposure and skin tones more even. Choose a low-VOC, scrubbable interior paint rated for healthcare use.
Low-footprint backdrop options when painting is not possible
If repainting isn't on the table, you still have solid options. Painted panels, collapsible fabric backdrops, and wall-mounted paper or vinyl rolls can all work well without taking over the room.
- Painted panels: Painted 4 ft × 8 ft panels can be stored vertically, then leaned against the wall during sessions.
- Fabric backdrop: Collapsible matte fabric backdrops fold into a carry case and work with a low-profile stand or wall support. Spring clamps help keep the edges flat.
- Paper or vinyl rolls: Wall-mounted paper or vinyl rolls can drop down fast and retract when the room needs to go back to clinical use.
| Backdrop Type | Floor Space Needed | Durability | Cleaning Ease |
|---|---|---|---|
| Painted wall panels | Minimal (leans flush against wall) | High | Easy (wipe down) |
| Collapsible fabric backdrop | Minimal (stand or lean) | Moderate | Moderate (spot clean or launder) |
| Paper or vinyl roll (wall/ceiling mount) | Near zero (overhead mount) | Vinyl: high / Paper: low | Vinyl: easy / Paper: must cut and replace |
In clinics with frequent patient turnover, vinyl-backed roll systems or collapsible fabric backdrops are often the easiest to live with day to day. Fixed backdrop height also matters more than people think. It helps keep framing the same across visits.
Write the backdrop model, mount height, and backdrop height into your photo protocol so staff can repeat the setup the same way each time.
Once the backdrop is fixed, the next step is to lock in the lighting and camera position so every session begins from the same frame.
sbb-itb-02f5876
Reading about the problem? See how Prospyr solves it in one platform.
Book a DemoSet Fixed Lighting and Tripod Positions
Once the backdrop is fixed, lock in the lighting and camera position. If either one shifts even a little, a follow-up photo can look off, even when the clinical change is the same.
Place compact lights for even, daylight-balanced light
For most small clinics, a simple setup works well: two compact LED panels or two small softbox lights placed at about 45 degrees from the patient, with each light roughly 3 to 4 ft away. This helps spread light evenly across the face and treatment area while cutting down on shadows. That matters a lot for repeatable before-and-after photos.
Set the lights to a color temperature between 5,000 K and 5,500 K. That range is close to natural daylight, which helps keep skin tones steady from one session to the next. If the room has windows, use blackout shades or another way to block outside light. Also turn off extra overhead lights so daylight changes don't affect exposure or color balance.
For tighter rooms, LED panels are usually the easiest pick. They're compact, stay cool, and give staff continuous light they can see before taking the shot.
Set tripod height, camera distance, and floor markers
After the lights are set, fix the camera position and mark the floor.
Place the camera 3 to 5 ft from the patient for facial photography. Keep the lens level with the treatment area so facial proportions don't get distorted. A fixed tripod height removes one more source of variation.
Use floor tape so staff can put everything back in the same spot fast. Mark the tripod legs, patient position, and light stands. Then note the setup in a short, room-specific checklist.
lights 3.5 ft away at 45°, tripod 4 ft away, lens level with face
Record those measurements in the room checklist so the setup stays the same each time.
Build a Step-by-Step Patient Flow in the Same Room
With the lights and camera locked in place, the room can become a repeatable workflow your staff follows at every visit. Once the markers, lights, and camera stay put, each patient can move through the same prep steps and pose sequence without guesswork.
Standardize patient prep and pose order
Patient prep should happen the same way every single time before the camera comes out. Ask patients to pull their hair back with a disposable headband, remove earrings, necklaces, and glasses, and change into a neutral-colored gown or drape that exposes only the treatment area.
If a patient is wearing heavy makeup or tinted skincare products, ask them to remove it, when clinically appropriate, before baseline photos. Makeup and reflective jewelry can change how skin tone and contour appear. Lipstick, bronzer, and large earrings are common trouble spots.
For positioning, guide the patient to stand or sit with their heels lined up to the floor markers, shoulders relaxed, and weight spread evenly. Keep the Frankfort plane level, with the ear-to-eye line parallel to the floor. One easy trick: ask the patient to look at a fixed dot or mark on the wall at eye level. That small cue helps stop slight head tilts that can make follow-up photos look just a little off.
Use the same capture order every time. For facial aesthetics, a standard sequence is:
- frontal (0°)
- left oblique (~45°)
- left profile (90°)
- right oblique (~45°)
- right profile (90°)
For lateral and oblique views, have the patient rotate their whole body, not just their head. That means feet, shoulders, and torso move together. It keeps the neck and jawline geometry more consistent from one visit to the next.
Protect privacy and document consent within the workflow
Privacy steps should happen at the very start of the session, not later. Close the door fully before prep begins. If the door has a window, cover it with a privacy curtain or frosted film. A sign outside the room that says Photography in progress – Do not enter can cut down on interruptions without needing extra staff.
Do not use personal smartphones for clinical photos. Use a clinic device that uploads images straight into a HIPAA-compliant chart. Prospyr can link images, intake, and consent in one record. That record lives in Prospyr's aesthetic EMR, the same place providers pull up notes and consent forms during the visit. That gives staff a simple way to:
- verify consent status before the session starts
- tag images by visit type and anatomical area right after capture
- keep clinical-only photos separate from any images the patient has approved for marketing
Check clinical consent and marketing consent separately before capture, and store each one with the image set.
Keep the room stocked the same way so reset stays fast.
Store Equipment and Keep the Room Easy to Reset
Use vertical storage and labeled kits for faster room turnover
After the photos are done, reset the room the same way every time. That’s what keeps the space ready for the next patient without slowing staff down. Store the tripod, light, backdrop, gowns, and hair ties within easy reach. Each item should have a fixed spot, with a clear label, so no one has to guess where anything goes.
Wall-mounted hooks work well for bulky gear. Install hooks rated for at least 25–50 lb at about 60–72 inches from the floor. Hang the tripod, light stand, and folded backdrop on separate labeled hooks. A slim vertical cabinet, 12–16 inches deep, can hold lights, small modifiers, and camera accessories without eating up floor space.
For prep supplies, use clear bins with simple labels. Group them by purpose, such as "Photo Gowns - Dark, No Logos" and "Hair Management - Hair ties, headbands, clips." That makes restocking fast for any staff member. Add a small sticker inside each bin that says: "Restock if fewer than 3 remain."
Use the same reset order after every session. Post a 5-step reset checklist on the cabinet door:
- Turn off lights and return them to marked storage positions.
- Collapse the tripod and hang it on the designated hook.
- Fold the backdrop and store it on the labeled hook or shelf.
- Replace used gowns and drapes with clean ones; restock prep kits.
- Check floor markers are visible and the floor is clear.
Keep the checklist to five steps. That’s short enough to use every time and long enough to cover what matters. A daily 5-minute reset audit helps catch drift before it turns into routine.
Conclusion: Keep the Small-Clinic Setup Consistent Over Time
A steady small-clinic photo system doesn’t need a big budget or a separate studio. It needs one neutral background, fixed light positions, a marked tripod location, a standard patient pose sequence, and compact storage that staff can follow without guesswork. The physical setup - hooks, labeled bins, floor markers, and a posted checklist - helps make consistency the norm instead of something people have to remember from scratch.
Prospyr can link photo consent, images, and reset tasks in one HIPAA-compliant workflow. The goal is one room, one reset, and one repeatable result.
FAQs
What camera settings should we standardize?
Standardize both camera settings and the shooting environment so your clinical photos stay consistent from one session to the next. Keep the light color temperature between 5,000K and 5,600K, use diffused front-facing light, and lock in the framing, angle, and zoom distance with a tripod and floor markers.
For privacy and compliance, remove embedded EXIF metadata and transfer images right away to a HIPAA-compliant, encrypted system like Prospyr for secure, centralized storage.
How can we photograph different treatment areas?
Keep the lighting, camera distance, and framing the same every time so images are easy to compare. A dedicated neutral-colored wall helps a lot. It also makes sense to mark the floor so both the patient and the camera stay in the exact same spot for each session.
For facial treatments, use four standard views:
- Frontal
- Oblique
- Left profile
- Right profile
Store the images in Prospyr so you can sort them by procedure and connect them to patient consent.
How often should we audit the setup?
Audit on a regular basis so consent records stay up to date. If a patient pulls back consent, remove the images right away. You should also run a HIPAA Security Risk Assessment once a year.
For day-to-day use, keep a laminated checklist in the photo area. It gives staff a simple, repeatable process to follow without guessing. Prospyr’s audit logs can also help you track who accessed patient media and make compliance checks easier.